Wednesday, December 22, 2010

Penny's Brown Rice

Penny is a trendsetter. She ate brown rice and whole wheat pasta long before anyone else did. I used to couldn't stand (sorry, poor grammar on my part there) either one of those things, and now they're staples in my pantry---much preferred to the white versions. Of course, that relationship was cemented once I realized that on myWeWa eating plan, brown rice and whole wheat pasta both have ZERO points, and their white cousins have a zillion points. But I digress.

I sent Penny a box of Pampered Chef goodies for her new kitchen---What was I thinking? She doesn't cook!---including a microwave rice cooker. Penny, I promise you it will be a life-changing thing if you just cook up a pot of brown rice once a week, eat part of it, save the rest in the fridge, and then a couple of days later make yourself a yummy stir-fry.....in ten minutes! These step-by-step directions will give you perfect brown rice---super cheap, super nutritious, and you don't have to leave your house to go pick it up: you make it yourself. See, that's what cooking means, darlin'.
1. Measure out 1 cup of brown rice (NOT instant or minute rice, just regular long-grain brown rice.) Put it in the bottom of your rice cooker, and then add about 1 teaspoon of salt and 2 1/2 cups of cold water.
2. Put the white/clear inner lid on top of your rice cooker---be sure the edges/ridges are on the top. Then put the brown lid on top of that, and lock the sides in the up position.
3. Put the cooker in the microwave. You want to set
it to cook as follows: first, cook it for 10 minutes on HIGH power, then for 25 minutes on MEDIUM (50%) power. Your microwave will probably let you set them both at one time, so you don't have to re-set after 10 minutes. (Push 10:00, power, 10; then push 25:00, power, 5; then START).
THAT'S ALL! After it cooks, take it out and let it set for 5 minutes before you take off the lid. Be careful, there will be some steam.
Here's what it will look like when you take off the lid, with little holes in it.

This is after you fluff it with a fork.
Because I needed to make some rice to take these pictures, Lucy and I had this for dinner: brown rice topped with fresh spinach sauteed in garlic-infused oil, salt, and pepper; and topped with parmesan cheese and tomatoes. It was tasty.
I have 2 cups of rice in the fridge now, for a meal later in the week. One of Lucy's favorite dinners (she can make it herself, so you SHOULD be able to as well, Penny!) is to make a quick stir-fry. She heats a little oil in a skillet, throws in a little fake chicken or tofu (or nothing if she wants just veggies), adds a package of stir-fry veggies from the freezer, stirs them all around for a few minutes until almost done, adds the cooked rice to the skillet, then pours in some Thai Peanut Sauce or Ginger-Wasabi sauce (I think I sent you both) and heats it all through. There's not an easier, quicker dinner to make----and it's as good as Pei-Wei without ever leaving home. You can even buy some chicken tenders to cook in there, or a little pork cutlet that you chop up---they cook so quickly, just do them first in the oil, then add the frozen vegetables.

Am I kidding myself, or might Penny actually start to cook her own brown rice? Stay tuned, for the next portion of "As the World Turns." I love you, Peeeeeeeeeeny!

'Twas the Night Before Baking

Is holiday baking one of your favorite things?
I guess it's one of mine, based on how much I do.
This year's has included Leslie's cheese straws (well, technically Trish's, but Trish never made them for me and Leslie has made me hundreds of them), Sister's chocolate-peanut clusters, blondies (they're actually the chocolate chip cookie recipe on the bag that I make in my big bar pan due to laziness; when I give them to people, they say, "I love blondies," so I figure maybe that's what they are), Nigella's breakfast bars, the Pampered Chef's Triple Layer Brownies (Libby made these one time and they were so good, I've always wanted to make them), and my Aunt Ruth's caramel layer chocolate squares. I think there was something else, but my mind is too sugared-up to remember it. I have the stuff to make Melissa's Toffee Candy (1 pound butter, 2 cups brown sugar, and 6 Hershey bars---what's not to like?) but it will have to wait until tomorrow night, once work is finally done. Here are a few photos for your eating pleasure.


And a tip: at some store near you, Land of Lakes unsalted butter is probably on sale this week for $1.99, like at the A&P here in New Yawk. Keep an eye out and stock up on several pounds for your freezer. I try to only buy butter at that price, and I find it's always on sale right before big holidays.

Happy Baking!

Monday, December 20, 2010

A New Do

Here's Lucy Saturday after getting her "Asian layered bob" haircut, but before getting her brows waxed at Elizabeth Arden The Red Door. Cute, huh?

Sunday, December 19, 2010

Ode to the Pinto

75 cents. That's how much I pay for a pound of dried pinto beans. That pound makes 13 servings (well, that's for normal people---it's half that many for me) which comes out to LESS THAN 6 CENTS PER SERVING. Is that the most unbelievable thing you've ever heard? Oh, but wait, you also have to add water and salt (or, Cavendar's if you're me) so that really might get the cost all the way up to a full 6 cents.
But, of course, after you add a big piece of corn bread and some kind of hot pepper jelly or chow-chow, why, you might actually be approaching something crazy, like 10 cents per serving. For what must be my favorite meal, since I make it once a week. Nutritional value: TOPS. Ease of cooking: Please, what is there to actually DO when cooking a pot of beans?

When I was a kid, we called these "red beans" at our house; but at my friend Nancy's house they were "brown beans." Now I just call them fabulous.

I love you, pinto beans.


Cheese Straws from Leslie and Trish

Leslie and I have introduced each other to many things over
the years. I trump, cause I introduced her to Randy! But she came close when she started making and sharing Trish Yearwood's cheese straws several years back. I would watch her pull the big zip-loc bags out of her suitcase when she came to visit, or I would open up a care package she went to the trouble of sending, and my mouth would start to water. I would sometimes hide the last bag from Lucy and Granny----I know, nothing to be proud of. This year I decided to try my hand at them myself. Lucy says mine aren't as spicy as Leslie's (and I think she means they're not as good) but I haven't had as much practice. Don't attempt this recipe unless you have the right tools for the job: a Kitchen Aid stand mixer, and a heavy-duty cookie press (the new Pampered Chef model with the rotating press works perfectly, and it has a potato ricer disc, to boot!).
I've made two batches so far. Takes me about 2 1/2 hours from start to finish, so be in the mood and don't do this while you're hungry, or you'll end up eating more than you pack up for giving---take it from me.
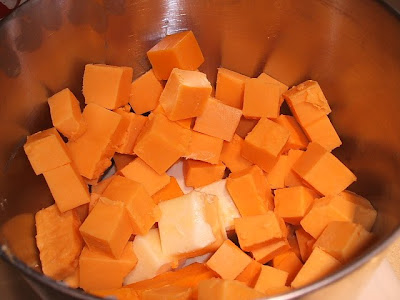
Ingredients: 30 oz. sharp cheddar cheese, and 2 sticks of butter: let them set out on your counter overnight or until fully room temperature. 4 cups flour, 2 tsp. salt, 1/8 tsp. black pepper, 1/8 tsp. cayenne pepper, a dash of garlic powder.
I diced up the butter and cheese into the mixer bowl. Use your heavy-duty beater and mix the cheese and butter "until the consistency of whipped cream." It takes about 30 minutes---more later on that.
Sift 3 cups of the flour with the seasonings. You know, I used to have an actual flour sifter, but now I just use this. Sift onto a big sheet of wax paper that you have creased in the middle, to make it easy for you to add this to your mixer at the right time. Keep the 4th cup of flour separate. This is a good time to turn on your oven, to 325.
I mix at speed 2 mostly, and occasionally crank it up to 4. About 4 or 5 times during the 30-minute mix time, I use my heavy duty Mix 'n Scraper (one of my favorite kitchen tools) to scrape down the sides of the bowl. I also take the whole thing off the mixer, remove the beater, and scrape under the beater a couple of times so that everything gets mixed in.
The batter is very stiff, so you'll need to put a little muscle into all of this and use heavy-duty tools----a wimpy spatula would break in a second.
After about 30 minutes, start to add the seasoned flour to the batter, about 1/4 to 1/2 cup at a time. To avoid a cleaning disaster, be sure to use your mixer's flour guard or drape a tea towel over the head of your mixer (long enough to cover the sides of the bowl.) Each time after you add the flour, mix just enough to get the flour well combined. Use as much of the extra 1 cup of flour as you need for the right texture...both times I made these I added about 1/2 cup.
Now you're ready to fill your cookie press and start piping.

Oops!
These look a little better. But I consider those squiggly ones cook's treats, so no problem.
After about 20 minutes in the oven, here's what you have. I use parchment paper just to make clean-up easier and to be able to re-use my hot pans sooner (pipe out onto fresh parchment while a pan is still in the oven, and rotate.) I keep 4 baking sheets going, so the baking (boring) part goes much faster.

Remember, it is more blessed to give than to receive. But these sure are yummy! Thank you, Leslie (I think).

Tuesday, December 14, 2010

Which is it?

Are they garbanzo beans?
Or are they chickpeas?
Who cares, when they're so delicious. Buy a bag of dried whatever-you-call-them, soak them in cold water for a few hours or overnight, drain and cover with fresh water and cook just until tender----I think it usually takes about 45 minutes or so. You owe it to yourself to try cooking them yourself instead of using canned ones. When they're almost done cooking, season liberally with Cavendar's Greek Seasoning (or salt and pepper, but if you don't cook with Cavendar's you're missing out big-time cuz this Arkansas product makes EVERYTHING taste better.) Then bake yourself a pan of cornbread and enjoy a super-healthy taste treat. The first time I cooked these from dried, instead of opening a can, Lucy didn't know what I had done but she immediately tasted the difference and asked why the garbanzo beans tasted so good. Now I buy them in bulk at Whole Paycheck (the canned ones taste slimy to me now...sorry) and cook up a super big pot so I can keep half in the freezer in small bags for whenever needed. These are perfect to throw in a salad, or to add to a whole wheat pita with whatever leftovers you have for a super work-day lunch.

Another favorite way to use half a batch is to spice and roast them. Drain cooked beans completely, and pat them with paper towels so that they're as dry as possible. Put them on your big bar pan in one layer and either spray or toss them with a tiny bit of olive oil and your favorite spices---I use cumin and a bit of cayenne, but my next batch will be in Old Bay. Roast them at around 450 until----here's the hard part----until they're very crispy but not burnt. It's a fine line, and I usually cross it with at least half of mine. But if they're not crispy-crunchy, they're really not worth it in the flavor and texture department, so step out there and take a chance. They're like munching on a big bowl of delicious nuts, but without any of the fat and a delicious flavor.

Monday, December 13, 2010

Mini Carrot Cake Cups


Our mama used to make delicious carrot cakes with cream cheese frosting, so this is a little way to remember Mildred on what would have been her 91st birthday. Enjoy!